
Lemur:
With the latest release of Ableton Live 9.6 and Link , I decided to revisit Liine`s Lemur app, which is available on both Android and IOS devices. Lemur is an application which, when designed and created through the Lemur editor, enables the iPad/Android device to be used as a touch screen MIDI controller. Your tablet can be used to control /trigger anything over MIDI and OSC, an example can be seen in Max Coopers boiler room session where an iPad running Lemur accompanies his set up , in the case of the video he uses it to trigger glitch samples from a Max for live patch running in Ableton, other users of the software include Orbital , Richie Hawtin, Stephan Bodzin and Alva Nota to name but a few.
Starting with a blank canvas you can design and map a controller within the editor to suit your specific needs. This is done by dragging in and editing several objects available, such as faders, pads or knobs. Lemur can then control any software or hardware device that can be controlled by the MIDI or OSC (Open Sound Control) protocol, this includes not only software such as Ableton Live , Resolume , Max MSP, VDMX, Serato, Pro Tools, Traktor and Logic but hardware synthesisers too.
Lemur Editor:
Objects are the main message generators in Lemur. There is a variation of different objects available, such as faders, custom buttons and pads. The Lemur Editor software allows you to drag several objects in to your project. After which you can edit them by resizing them and changing each objects MIDI or OSC properties .The editor is used with the tablet, this will enable you to see the developing and designing of the interface , which will allow you to see how your interface will look in real time as you design and develop it.
To connect both the iPad and the Lemur editor to each other, first ensure that both the computer that is running the editor and the iPad that is running the Lemur application are connected to the same WI- FI network. Once connect is selected within the editor, a window will pop up, by selecting the device in question and hitting connect, both devices will be in communication with each other.
Once connected, the iPad will contain whatever is currently on the Lemur editor screen and objects can be seen on the tablet screen as they are imported into the Lemur editor.Objects are added by simply dragging them into the main window , many different objects are available to use , such as faders , knobs , custom buttons , step sequencers, multi slider, step note, signal scope and more. These leave the list of devices being created to be endless. There is a wealth of devices available for free download on the Lemur community page

With Lemurs ability to control core MIDI in hardware synthesisers, drum machines and other electronic music devices, several MIDI message types are available which include the following:
Note off ——-Message is sent when a key is released
Note on——–Message is sent when a key is pressed
Control change——Messages cover a wide range of functions of which can be controlled via MIDI.
Program change——-Used to change the patch number of synthesisers
Channel pressure——-Conveys the amount of overall (average) pressure on the keys at any given point
Pitch bend ——-Used to indicate a change in the pitch wheel
System Exclusive——-Allows manufacturers to define their own specific message formats
In the Lemur settings select MIDI 0 and then select control change which will be the type of MIDI message being used, by selecting automap (the button on the right hand side of Target), Lemur will automatically assign the object selected the next MIDI message in question, so if you set an objects MIDI parameters to be control change message 1, then once the next object is selected it will be assigned control change message 2, this feature prevents you from assigning the same MIDI message to a multiple of objects.

Once an object is selected, not only can its MIDI parameters be assigned but it can also be labelled and given designated colours for its on/off state. The image below is the settings tab for an object in the project; it was given an off colour of pink and an on colour of yellow. So when the pad is pressed to trigger a clip within Ableton live, it will turn yellow, this will provide a visual aid when playing a live set.

Connecting Lemur to Ableton Live Mac & Windows:
Mac Set Up:
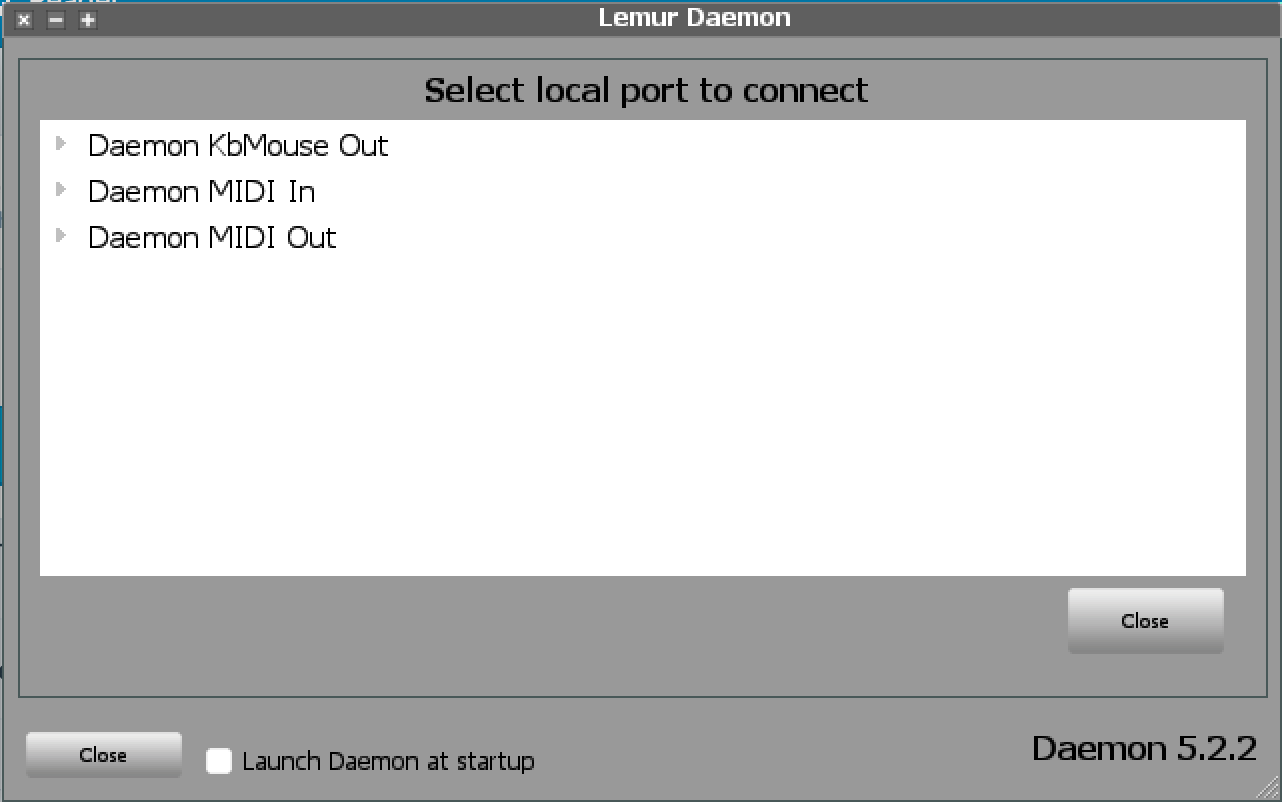
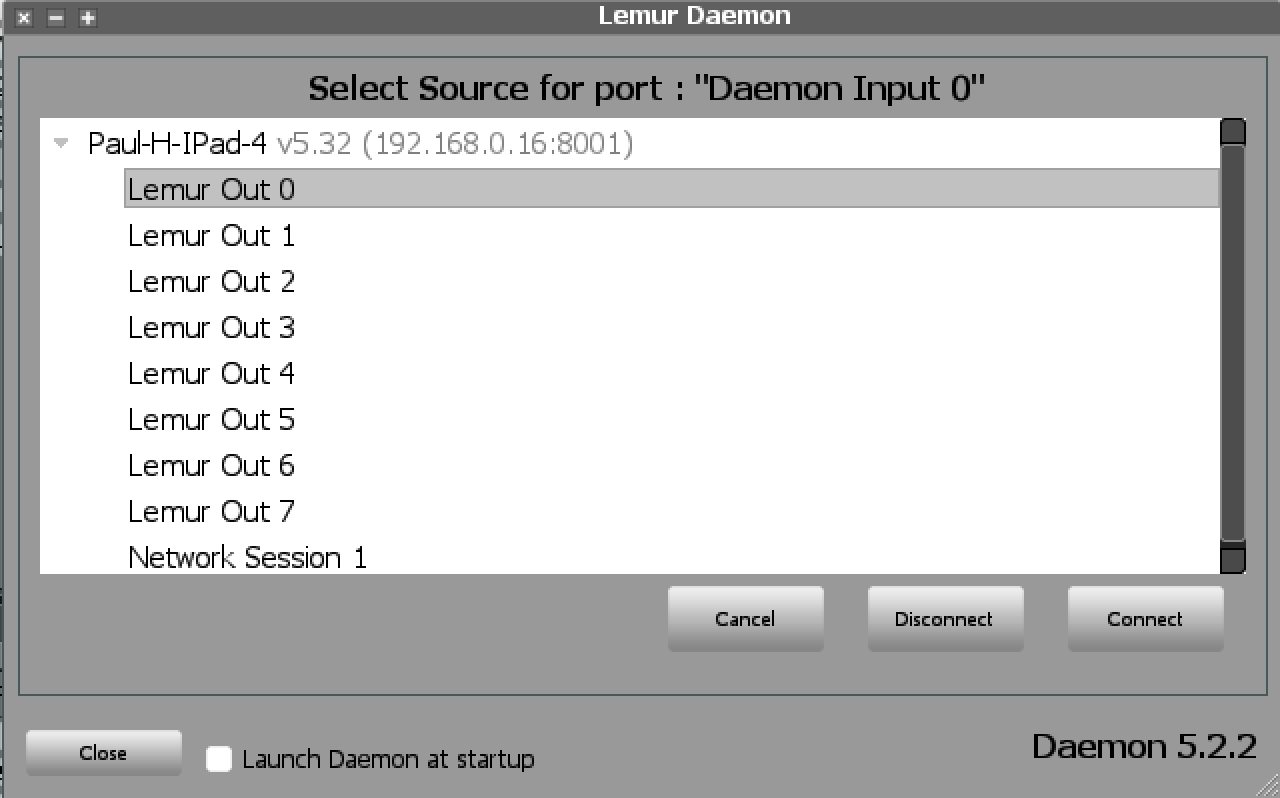
To connect Lemur to Ableton Live , the Lemur Daemon utility is used , this allows Lemur to connect to the virtual MIDI ports on the computer. Press Add , then double click on Daemon MIDI In (Step 1), the tablet in question will be displayed, select Lemur Out 0 and press connect (Step 2). The same process is done to create an MIDI out (Lemur In 0) . After this process the Lemur Daemon screen will look like it does in step 3 below.
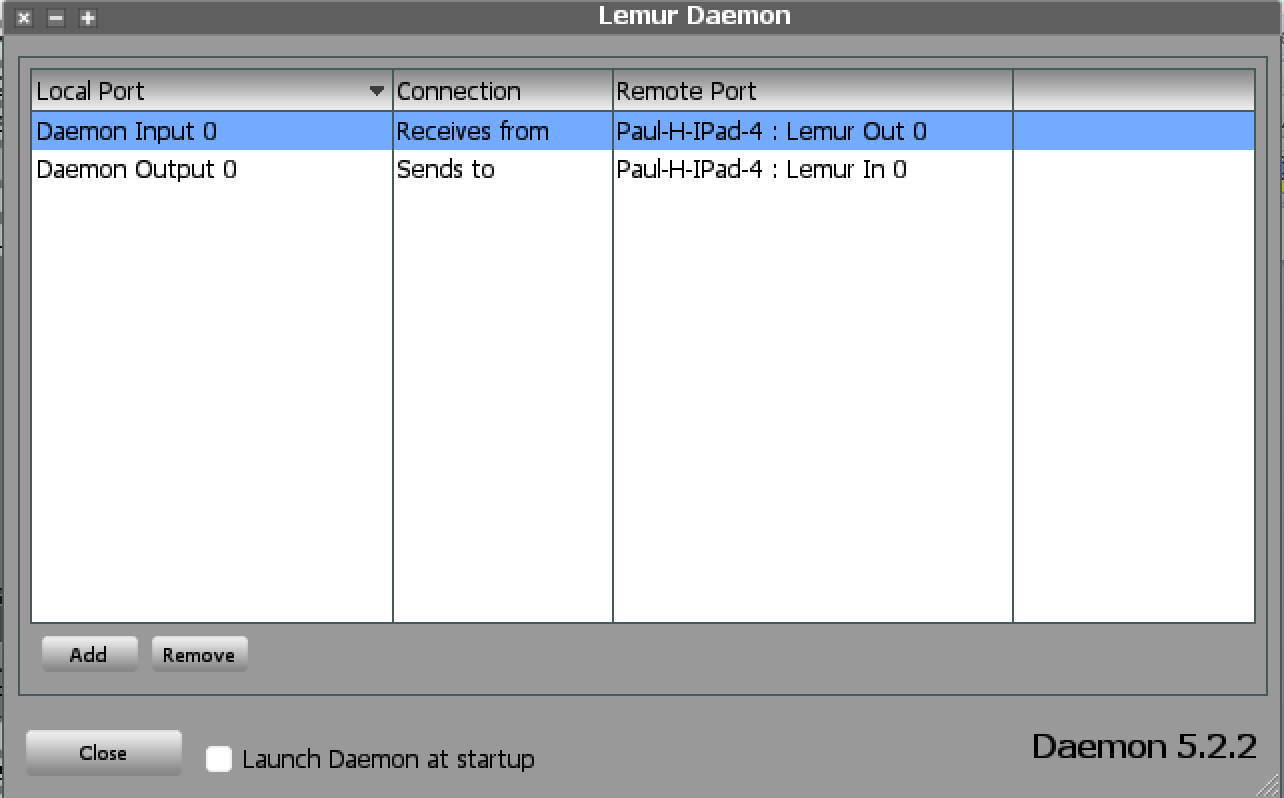
Step 3
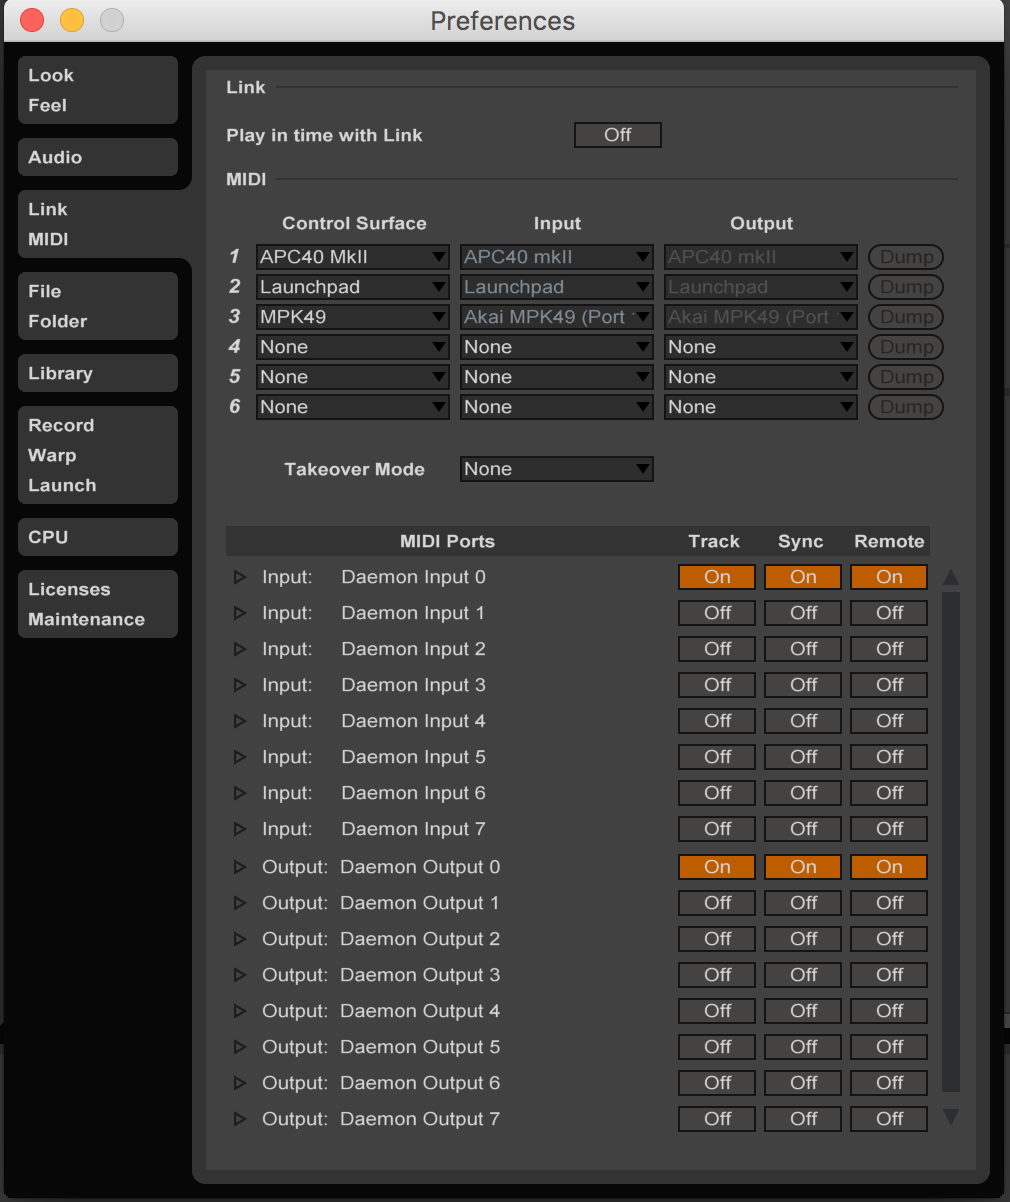
Open up Ableton Live preferences and in the MIDI tab, note that the Daemon MIDI ports are all listed in Ableton Live , we selected Daemon Input 0 and Daemon Output 0 as our ports. These are selected in the preferences menu.
Now open up a project file (or just drag in any samples into the clip view), my pressing cmd+m you will now be able to assign objects in your Lemur controller to clips, faders, knobs or any parameters controllable with in Ableton and Max for Live.
Windows Set Up:
To connect Lemur to Ableton Live , the Lemur Daemon utility is used , this allows Lemur to connect to the virtual MIDI ports on the computer. LoopMidi is Virtual loopback MIDI cable for Windows, this software is used to create virtual loopback MIDI-ports to interconnect applications for MIDI communication.
Using Loop MIDI ,create two virtual MIDI ports, which in this case are named Loop MIDI Port A and Loop MIDI Port B. These ports will be recognised by Ableton Live and will allow for Lemur messages to be send and received by Ableton Live, so once in the MIDI settings in Ableton Live , both Loop MIDI Port A and Port B will be available as active MIDI connections.
Once opened Lemur Daemon automatically scans all available MIDI ports in the computer, these include both physical and virtual connections, so the two virtual MIDI ports, which were created earlier, will be available when setting up Lemur Daemon.
Within the utility, select add and then MIDI Daemon out followed by clicking on the tablet in question, then MIDI loop A and finally Lemur Out 0. This will then assign the MIDI Loop Port A to receive MIDI data from the Lemur application on the pad. By repeating the same process but with selecting MIDI Daemon in, MIDI loop B and Lemur In 0, you will assign the MIDI Loop Port B to send MIDI data from the Lemur application on the mobile device.
Open up Ableton Live preferences and in the MIDI tab, note that the LoopMIDI ports which we created are listed in Ableton Live , we selected loopMIDI Port A as the input and loopMIDI port B as the output.
Now open up a project file (or just drag in any samples into the clip view), my pressing ctrl+m you will now be able to assign objects in your Lemur controller to clips, faders, knobs or any parameters controllable with in Ableton and Max for Live.

Thank you for reading this post , I hope that you find it helpful and feel free to comment or ask any questions related to the topic .

Thanks, this is a nice tutorial. One thing I’m waiting for is USB MIDI cable support on Android. These cable adapters work on IOS but no support yet on the Android version. Fingers crossed ~ Warren
LikeLiked by 1 person