
Ive decided to write a quick post on some basics and tips aimed at people just beginning to write music that have helped me with mixing down music , I intend to cover this topic more extensively soon along with some tutorials on electronic music production , mostly concentrating one specifics such as side chaining , reverb , programming electronica/IDM beats and many more. For now Im just going to go through some tips which I found useful over the years , these were both learnt in college and things I generally have done in the studio for years.
1. Trust your ears
When using music recording software , it is so easy to rely on our eyes rather than our ears when mixing down. What I usually do is start the project file from the 4th bar , giving me a few seconds of silence before for play back and to also quickly ensure that new elements or changes are happening every 4th, 8th, 16th, 32nd, or 64th bar. Closing the laptop screen slightly , I sit in the sweet spot and listen to the mix , I find that errors are quickly found this way , it could be a timing issue of something or that something is not sitting well in the mix well due to a clash of frequencies which leads me to the next topic EQ.
2. Equalization
The correct use of EQ can be the difference between a muddy sounding mix and a great sounding one. There are several charts available displaying the ideal frequency ranges of instruments but generally I would use my ears for this while sometimes referring to the chart below.

The point of the chart is to show what frequency range each instrument lays and where a sound can be enhanced depending on what is required. For example with a hi hat/cymbal , to make the sound bright you would boost the frequency between 8-12kHz. Below I have included two screenshots of how I EQ a Kick Drum and Hats , generally I would have two kick drums in my mix .
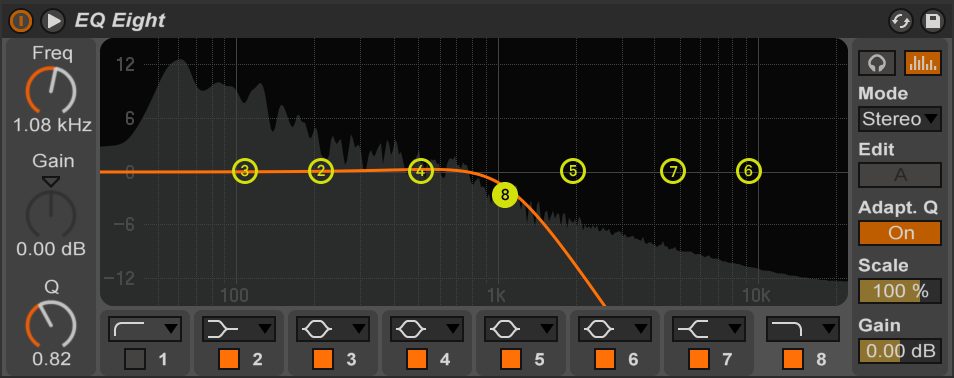
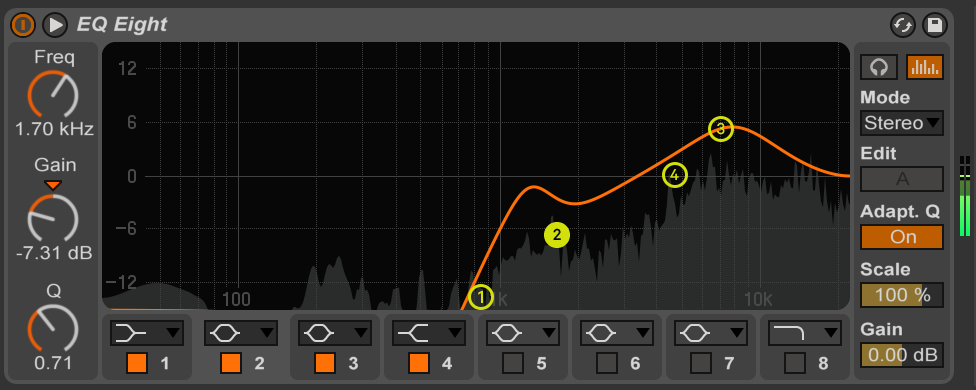
The reason the kick drum is cut off at around 2kHz is because from there to 20kHz is generally un-used for this instrument , it also allows room for another instrument which would be in this frequency range. Putting it simply the Kick drum is predominantly in the bass range and the Hi Hat is in the treble , by EQ-ing both accordingly will create a nice clean mix , each instrument would be given space to breathe.
3. Structure
This is something that some musicians have an issue with and I was one of them. To fix this carefully listen to a genre which you are trying to create (house, electronica, techno) and break down the track , then by placing a track from an artist of your required genre into your session file, copy their exact structure while you are mixing down. I found this really helpful , I intend on doing a full post on structure within the next week or so.
I hope you enjoyed reading this post and learnt something that you can take with you to the studio, thank you for reading and feel free to comment and follow the blog.
The next post will be a tutorial and another free download of a Max for live Jitter device for Ableton Live.

