
For this tutorial , Im going to show you a method on visualising a beat in Ableton Live using Max for Live. This can be added to an already created jitter patch or used in the free download that I have provided.
For the purposes of this post , we are going to add the beat visualizer to a previous tutorial , so those who are new to to Max 7 can read up on the basics and download the required patch.
Once the patch is downloaded , open up Ableton Live and drag the .amxd file into an audio channel (as seen in the screenshot below) and click on the edit button (the first button on the top right hand side) to open/edit the Max for Live patch.

Once open , select “Patching Mode” .
For the purposes of this tutorial I am going to delete the comments in the patch but feel free to leave them in if you wish .
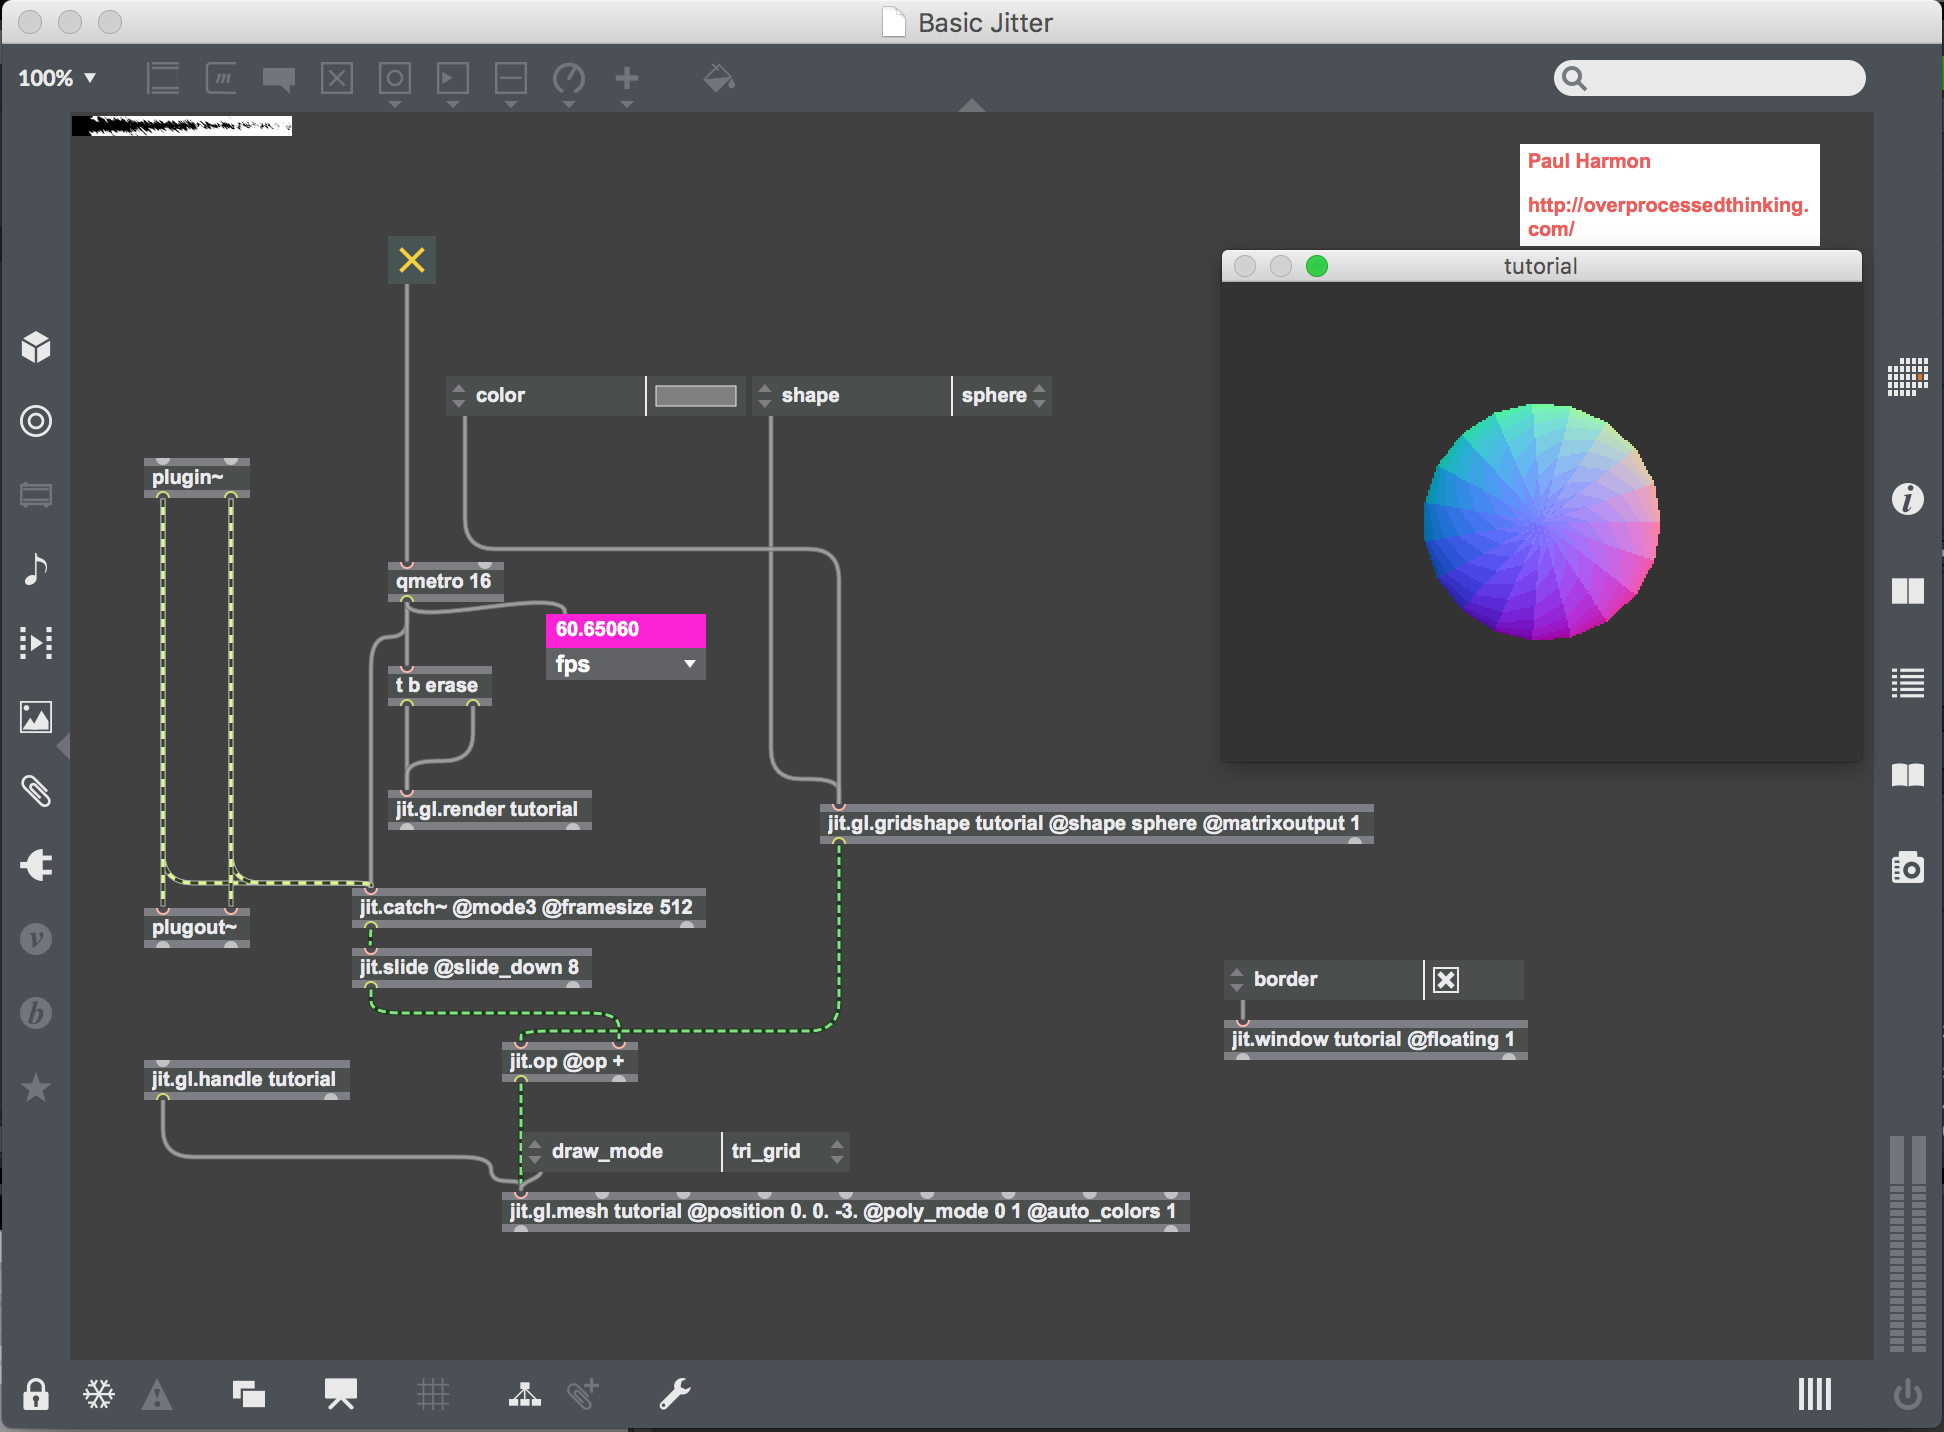
The idea of this patch will be that every time a kick drum is sounded, a bang will be sent into an object or message in Max, this could be used to change the color of the shape, move the camera by a certain amount , increase or decrease the size of the shape or add noise.
Detecting the beat:
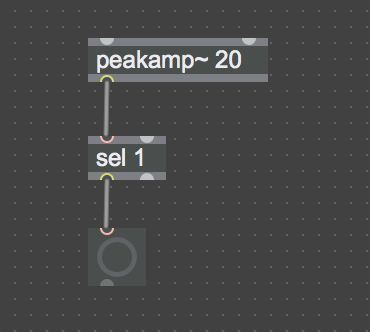
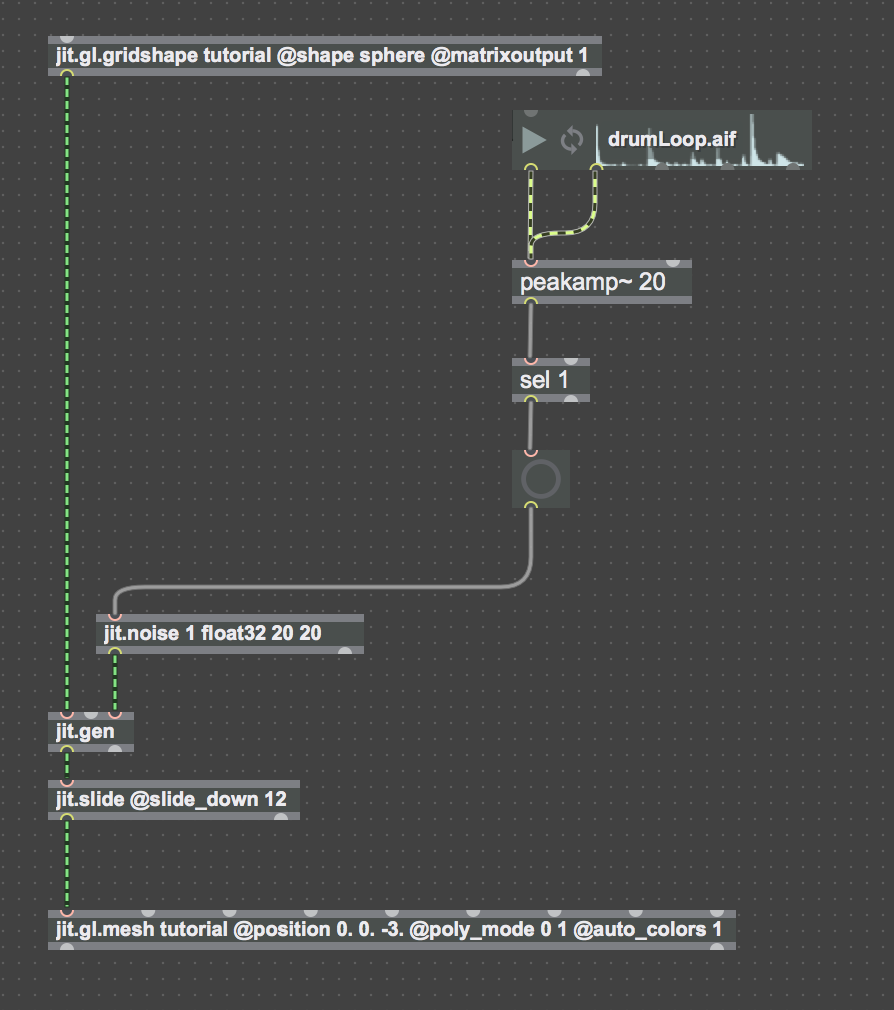
To detect the beat we are going to use Peakamp~, this object monitors an incoming signal and reports the absolute value of the peak amplitude of the audio signal it has received since the last time it was reported . So basically this object will determine when the loudest parts of the audio occur and once this happens it will report the absolute value of the audio file and proceed to look for the next value, the time (in milliseconds) between reports can be changed , for this tutorial we will set it to 20ms.
The peakamp~ object is connected to the sel object which outputs a bang based in the input match, this is then connected to a bang (press B to create it) .
The next step is to drag in a drum loop from the audio browser in Max and connect it to the peakamp~ object (this loop is for demonstration purposes).
Lock the patch by pressing CMD+E and play the drum loop , do you notice the bang lighting up once each kick drum sounds ? Now we can use this information to control something inside our patch.
For this tutorial we are going to use it to add noise to the already drawn sphere.
Visualising the beat:
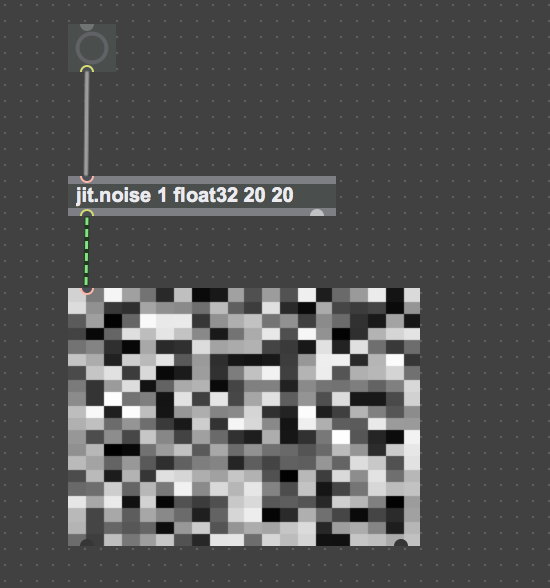
The jit.noise object is used , this generates matrices of random values, the type noise created will be float32 . To understand how this object and the concept of adding noise to the sphere , connect a bang to the top of the jit.noise object and then connect the jit.pwindow to the bottom as displayed in the image below. With the patch locked press the bang several times and notice what happens in the small window that you just attached to the noise creating object. Random noise is being created each time and this is what is going to happen when the peakamp~ object sends a bang from each time it reports the absolute value of the peak amplitude from the audio signal, this will then be added to the sphere .
Adding Noise to the shape:
The next step is to add noise to the sphere , this will occur every time the kick drum is sounded.
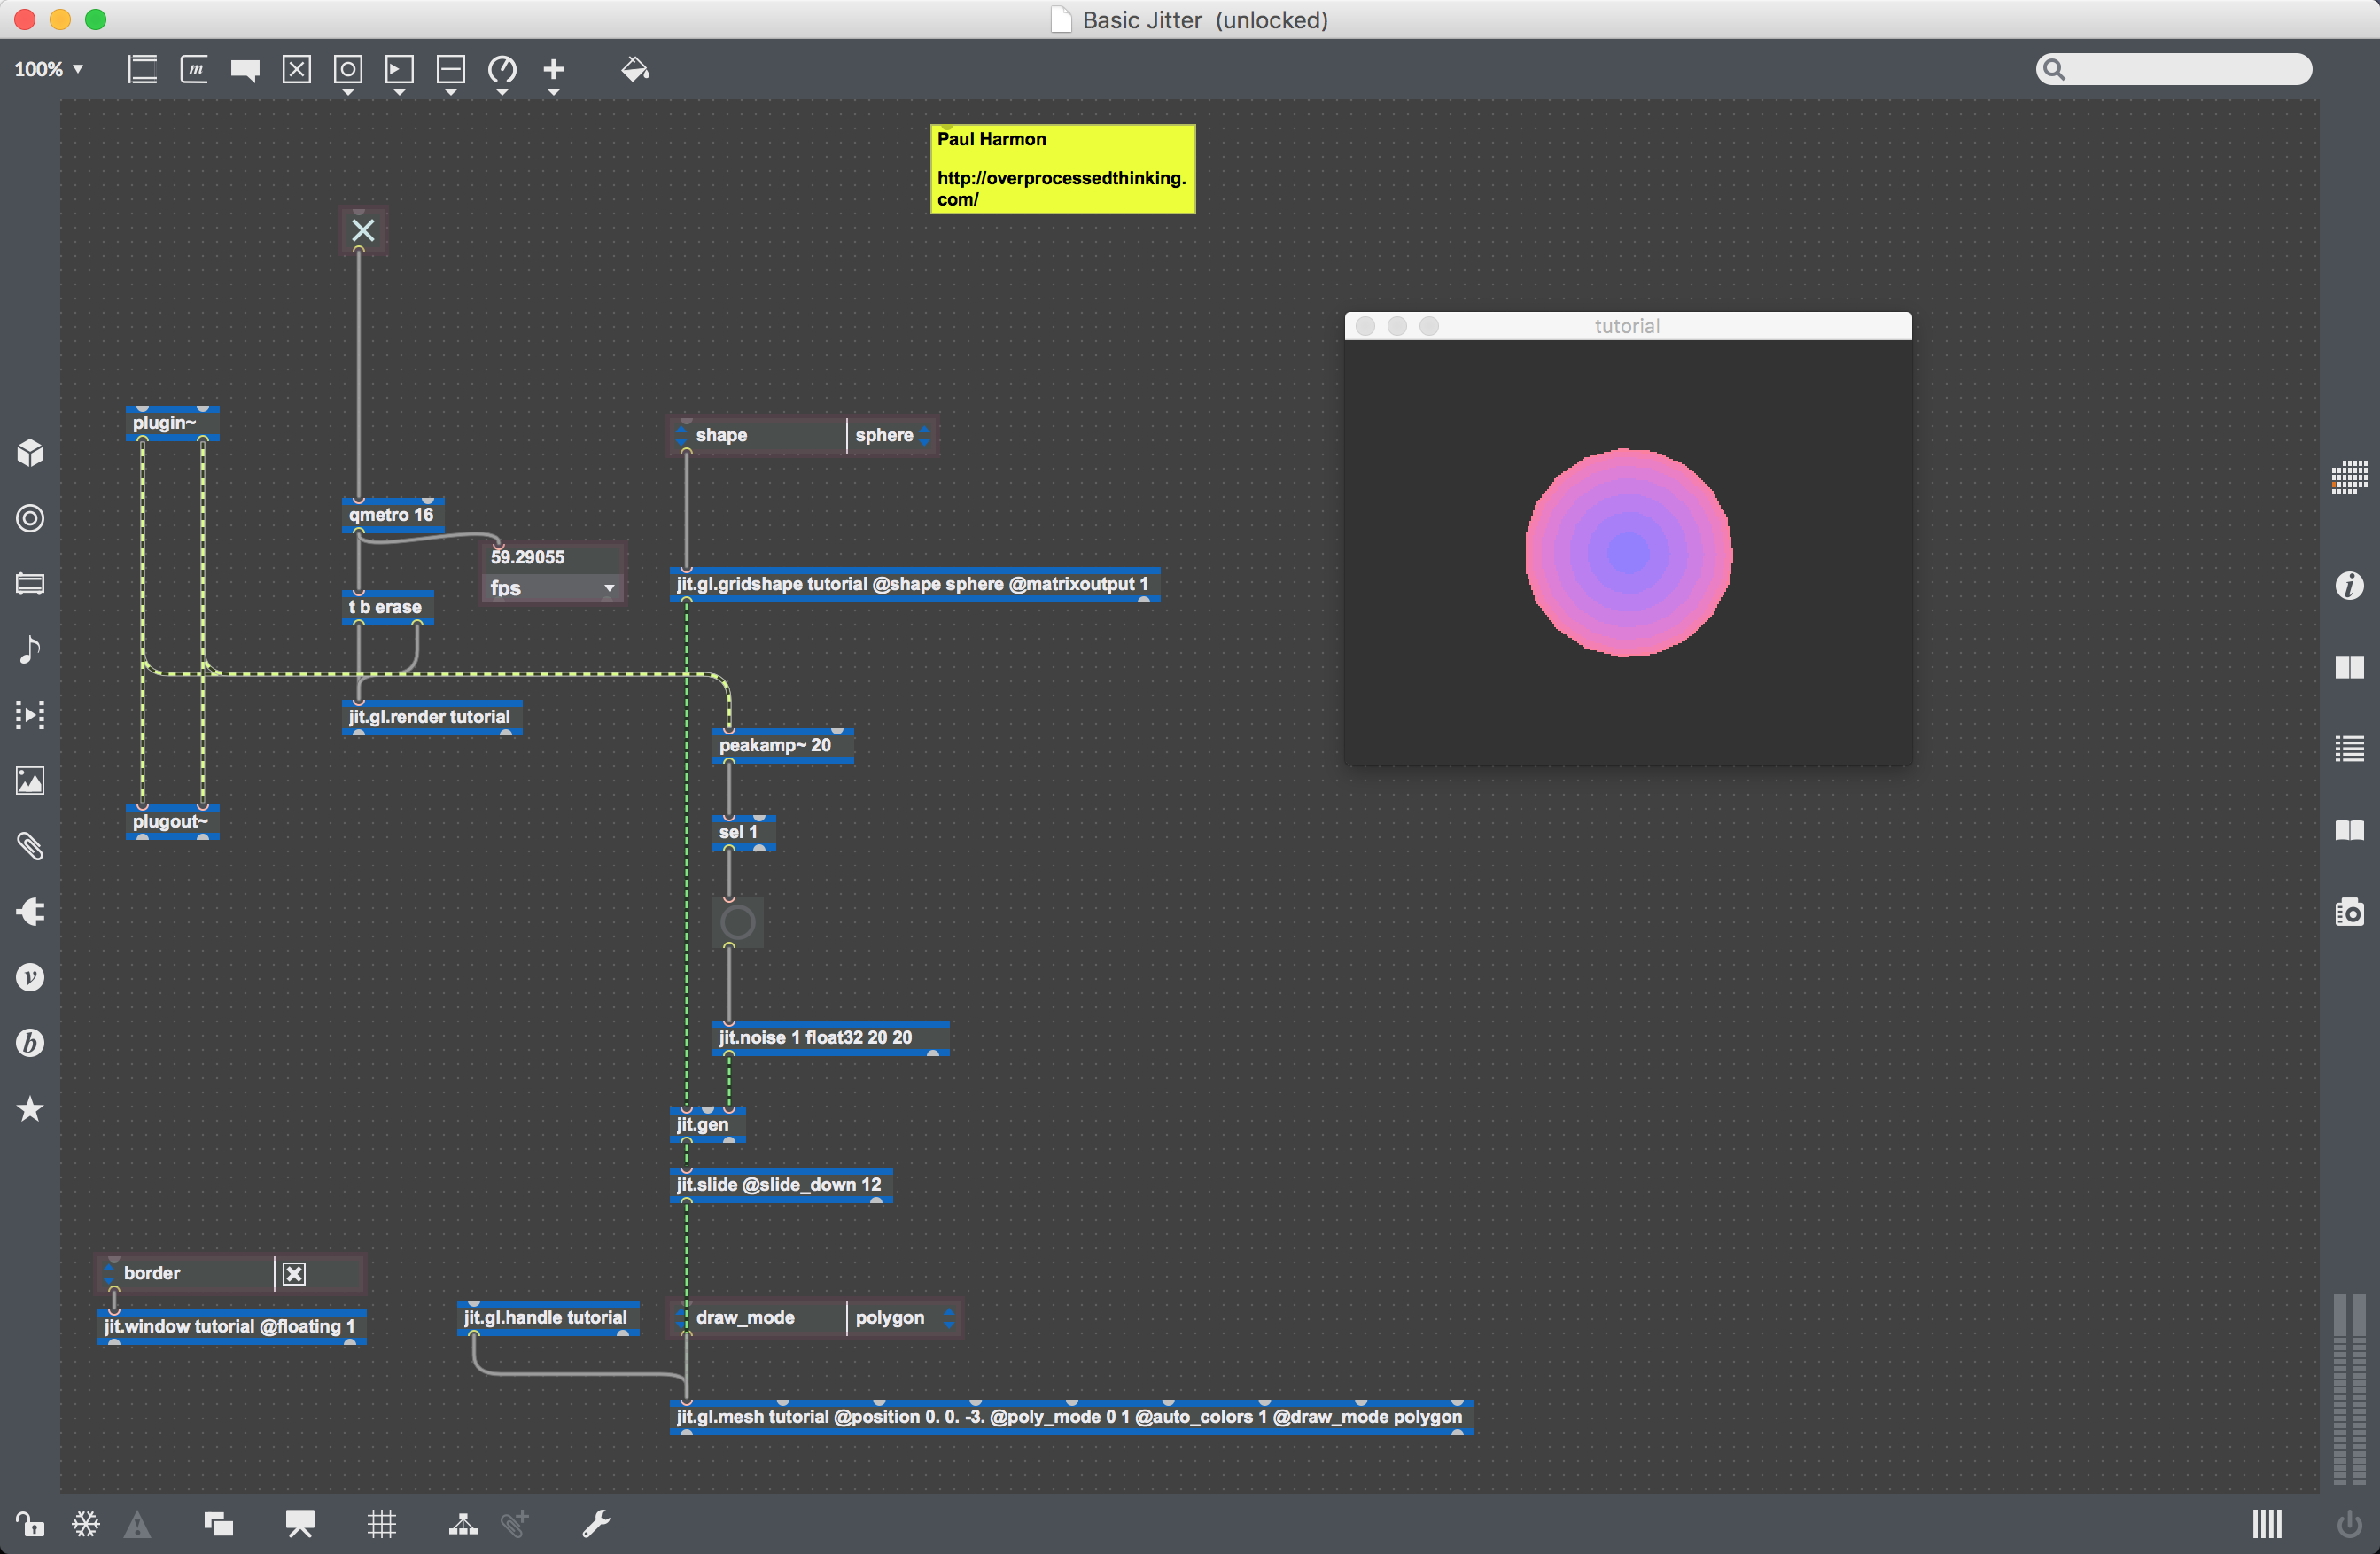
To do this we are going to set up a basic mixer using the jit.gen , add this object , lock the patch and double click on it to open it. We will be adding two inputs (noise and gridshape) and an output , both inputs will be added together using the + object as seen in the image below.
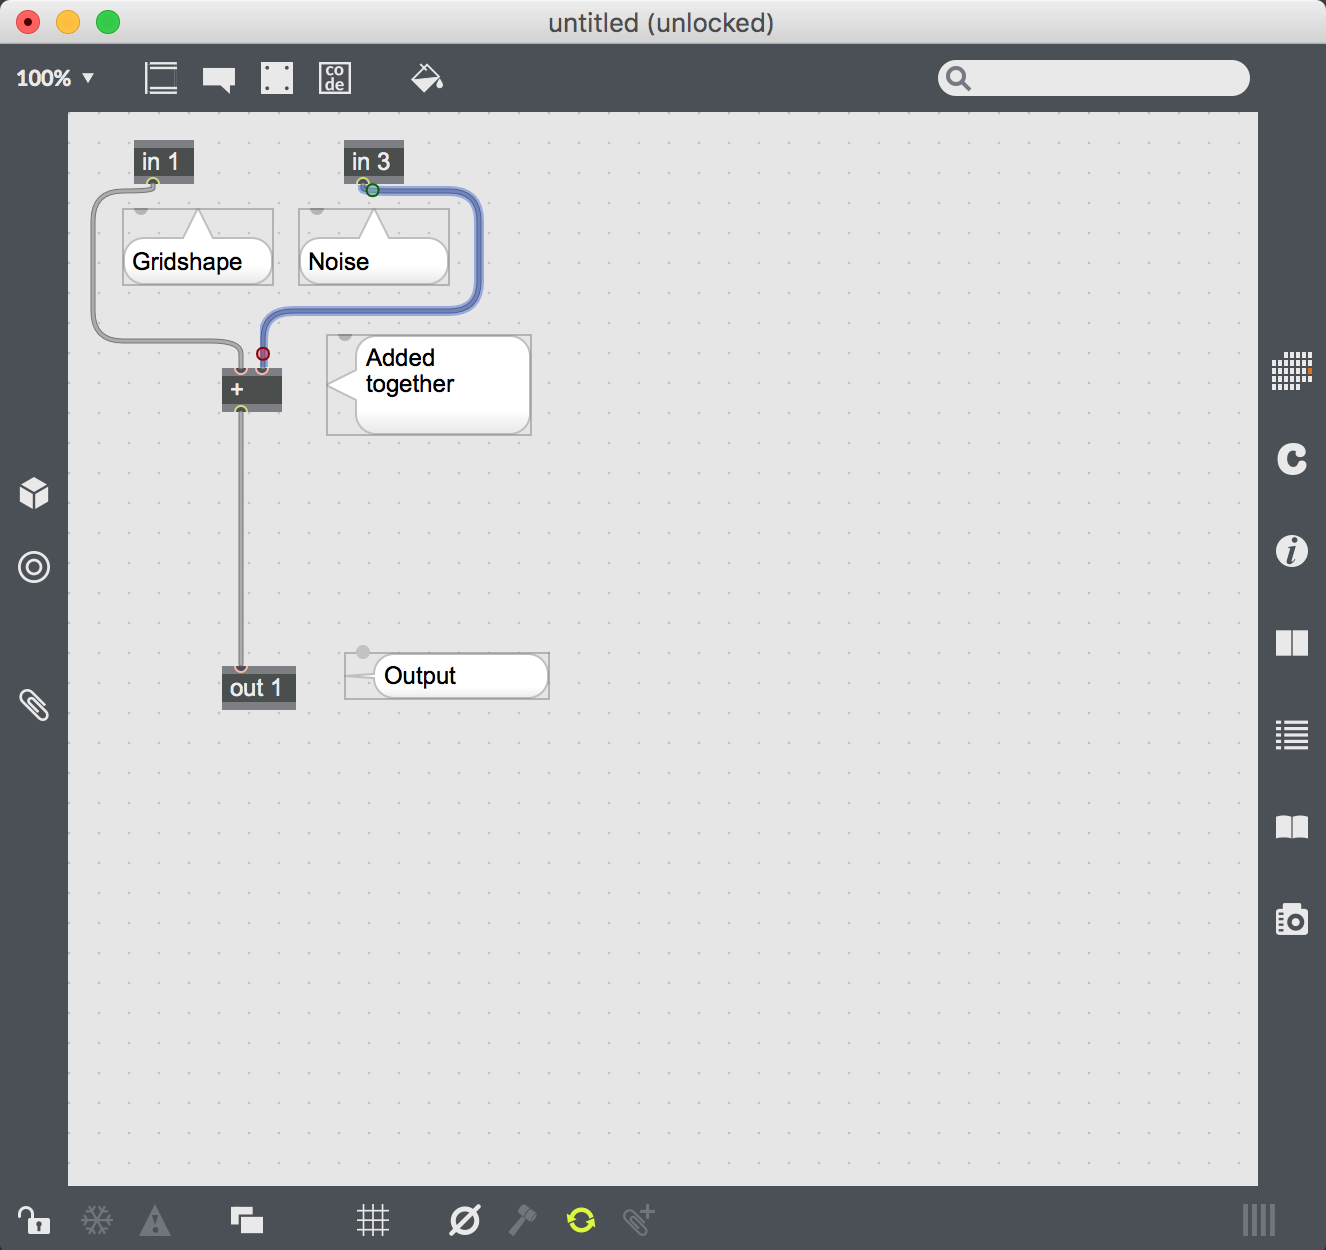
Now we add our previously created beat detection and jit.noise to the gridshape, lock the patch , select the toggle to turn it on and play the audio drum loop. After every kick drum , noise should be added to the sphere .
The final step is to replace the drum loop with the audio from Ableton live, this is done by connecting the left and right outputs of the plugin~ object to the input of the peakamp~ object.
Now close the .amxd file and save it , drag an audio file into the same channel as your Max for Live patch . Ensure that the your audio file has prominent beats , anything 4/4 would be good , Ive included a techno drum loop with the patch for free download , which can be downloaded here.
Summary:
With the beat detection working , you can now use it to control many aspects of Jitter , such as change the color , rotate it by a certain amount , add in additional shapes and more. I can cover these in a future tutorial if anyone wants .
Thanks for reading this post , feel free to ask questions or leave comments and follow if you want.


Hello! I explored all your max for live applications, they are all awesome! Like you said, can you elaborate how you can control the color or rotate? I’m just randomly placing numbers, or do you have a list which each color, rotate, etc., do? Thank you!
LikeLiked by 1 person
To change the color turn on editing mode , then on the jit.gl.mesh object , remove the @auto_colors 1 or set this to 0 , this attribute creates a multi-color effect , then hover over to the left hand side of the object until you see a yellow arrow , click that , select attributes and then color , this will attach a color box to the object and will allow you to change it to any color.
To control rotation , you can use jit.anim.drive .
LikeLike
Thank you! To rotate is the same with the Audio Reactive Web Cam?
LikeLike
I already solved it! Awesome patch, thank you!
LikeLiked by 1 person